|
Welding-testingthe all important proofSOLUTIONS with Effective, Powerful Advice
Welding-testing is used to determine the soundness of welds. It is made on test pieces intended for destructive testing. Testing of welds is used to verify that the welding procedure is under control. Weld testing, even if not required by specifications, helps welders to check and improve their own technique. Among the test are tension and bend tests, made on specimens of a certain shape and dimensions.
Visit the NEW Page on Welding Overview, for a thorough
Weld sections are prepared for metallographic tests. After sectioning, the sections are mounted in plastic holders for handling. The surface of interest is then ground, polished and etched or heat tinted. Treated surfaces are thus ready for optical microscope examinations. Visual examination under suitable magnification is used to check the micro-structure and the presence of questionable features. Hardness testing is a useful indication of thermal transformations. Welding tests are performed for Certification of Procedures or of Welders. See also Welding Qualification, Welding Procedures, and Production control of spot welding and other routine testing are done on test pieces to verify the quality. Weldability test is a different kind of testing: see details at PWL#082.
Welding-testing is usually understood as a destructive testing. What is gained from testing? Proof of performance, peace of mind. Moreover record of results may be requested in order to accept production batches
Testing is used to certify welders and to qualify the adequacy of procedures and of performance. Adequate reports show to customers that the welding operation is successful as expected and needed. Welding-testing has to be spelled out on the drawings, or on a technical document, or on a called for Specification or on the purchase order. The purchaser may be able to help by defining the tests that will satisfy engineering. If you did not yet find what you need, why not typing your question in the following Search Box?
Details on standard Welding-testing methods can be found in ANSI/AWS B4.0:2007
AWS B4.0M:2000 (R2010)
Mechanical testing... Mechanical Welding-testing is regarded as the most reliable and least expensive to determine strength and other properties. Welding-testing specimens to destruction is one of the most important means to assess the quality of welds. Other complementary element, can be found in another page, on nondestructive WELDING INSPECTION of actual welded structures. Among mechanical testing, classic tensile tests are performed using instruments called Universal Mechanical Testing systems. Prepared test specimens are needed. They should be precisely machined through weld material to the dimensions and shape required by Standards. Sometimes Specifications require to get strength results in the weld equal at least to those of the base metal. Other times they permit that a weld exhibit a given percentage (80%, 90%) of the base metal strength. An Article on Extensometers was published in the July 2006 Issue of Practical Welding Letter No. 36. To read the article click on PWL#036. An Article on Modern Non Contact Extensometers was published (7) in Issue 141 of Practical Welding Letter for May 2014.
In house Welding testing or outside? If it is performed in house with simple testing instruments, (like tensile testing of spot weld coupons) and if it is routine and repetitive you may gain time. Testing with some simple instrument will give you the answer on the spot. Simple testing... What are non instrumented Welding-testing? These are tests that anybody can perform in the shop, and give a measure of understanding and of confidence in the results. It is recommended to do some sort of these tests just to know for yourself. You should first establish the form and dimensions of the test piece, to reproduce features as similar as possible to those of the real weld, and weld it. Then destroy the test piece in a vice, under a press, by giving blows with a chisel or a hammer, by peeling etc. Obviously, if the test piece pulls off too easily then the weld is not adequate. You may also initiate saw cuts in the weld to be sure of the location of rupture upon bending. The fracture may then reveal internal defects (porosity, slag inclusions etc.). Nick-Break?... One such test is performed on Nick-Break specimens, which are transversally welded strips where slots are machined at both weld ends. They are then stressed in bending so that a crack will initiate at one of the cuts and propagate through the weld. The structure of the fractured surface is then examined for DEFECTS. To raise your welding quality you need to establish your Welding-testing routines.
That will avoid discussions with your welders and customers, improve productivity, save rework and repair, and save your time.
Bend tests... Bend tests are popular and informative tests. Usually they can be performed with simple equipment, like a jack or a press, readily available in many shops. If needed by contract, Specification requirements must be followed accurately for the test to be valid for qualification. The result of the test should be as demanded. Sometimes a certain angle of bend should be reached without fracture. Either warping of the test piece without fracture or a break outside the weld, or whatever other feature should be according to Specification requirements. In any case the Welding-testing result must be documented in a test report, possibly with a photo, and the test piece itself must be identified (welder's name, equipment, procedure, date) and kept for later inspection by the customer's agent. Guided bend tests are a special type, being performed on specially prepared test pieces, using a jig manufactured to constrain the specimen to follow a given contour.
Click on the link Bend Testing to see the page that was recently added to the www.welding-advisers.com/ website. An Article on Bend Tests was published in the September 2004, Issue No. 13 of Practical Welding Letter. An Article on Filler Metal 312 failing transverse side bend tests was published (4) in Issue 150 of Practical Welding Letter for February 2016.
An interesting Article is available by clicking on Weld sections... Metallographic tests require a minimum of metallurgical experience, and some specific equipment, like a disk sectioning machine, a specimen mounting press, grinding, polishing turntables. Also some acid etching capabilities and an optical metallurgical microscope with magnification capacity of up to x500 at least. Testing to find the weld position or to view the weld bead shape or obvious discontinuities in a prepared section is not difficult to interpret. But if subtler needs arise then one must use the resources of a professional metallurgist, whose preparation is tuned to these more demanding tasks. These may require to discern between metallographic phases in different areas of the weld, to determine the adequacy of a certain welding procedure, or to investigate the reasons of unacceptable results. In a new page on Weld Macro, we present a simplified procedure that could be easily set up in any welding shop, even the simplest one. It is meant to provide a way to examine the Macro structure of cross sections of weld test pieces. We consider this essential to the positioning of the welding shop as one that cares for the customers and for the quality of the work they get. An Article on Metallography of Welds was published (7) in issue 95 of Practical Welding Letter for July 2011. Hardness testing on metallographic sections as above gives indications on the microstructure developed in and around the weld: too hard a material may be prone to cracking, and special procedures may be required to avoid such dangerous conditions. See our new page on Hardness Test. An Article on Information from the Hardness Test was published (11) in Issue 146 of Practical Welding Letter for October 2015.
These are... These above are the main destructive testing methods used for monitoring welding procedures before starting and during production, for maintaining a constant high level of performance including equipment, procedures and workmanship. More specialized test have been developed for special needs. Among them we may mention fatigue testing, vibration testing, acoustic emission testing, but we cannot cover them here in any detail. You can find independent Agencies authorized to certify for a fee your An Article on Testing Filler Metals was published (4) in Issue No. 47 of Practical Welding Letter for July 2007. Click on PWL#047 to read it. An Article on Metallurgical Aspects of Abusive Grinding was published in Issue 52 of Practical Welding Letter for December 2007. An Article on Testing Oil Storage Tanks Welding was published (11) in Issue 60 of Practical Welding Letter for August 2008. An Article on Welding Test Positions (7) was published in Issue 66 of Practical Welding Letters for February 2009. Click on PWL#066 to see it.
An Article on Microhardness test was published (7) in Issue 82 of Practical Welding Letter for June 2010. An Article on Changing Materials Testing was published (7)
in Issue 148 of Practical Welding Letter for December 2015. An Article on Testing Automotive Composites was published (3) in Issue 152 of Practical Welding Letter for April 2016. Website Page are continuously added. Click on Creep Test and Weldability Testing Weldability-testing is generally designed to evaluate the effects of welding on specific properties and characteristics of base materials under definite welding and testing conditions. Weldability-testing is critical for anticipating correctly the welded material behavior in real constructions. Different tests are used in various situations. Considerable experience is needed for successful application. See our page on Weldability Testing. Two examples of weldability tests are given in past issues of PWL. Bulletin 34 of Practical Welding Letter provides online links on the subject of Mechanical Testing. Click on PWL#066B to see it. An Article on Gleeble Simulations was published (2) in issue 79 of Practical Welding Letter for March 2010. Click on PWL#079 to read it. A complete Issue of Mid Month Bulletin 50 on Weldability was published as PWL#082B, further down from the regular issue. An Article on Modern Testing for Advanced Requirements was published (7) in Issue 131 of Practical Welding Letter for July 2014. An Article on Measuring Heating Rates in Vacuum Furnaces was published (3) in Issue 140 of Practical Welding Letter for April 2015. A Welding-Advisers Website page on Mechanical Properties and its companion Bulletin 108 were introduced in an Article published (8) in Issue 142 of Practical Welding Letter for June 2015. An Article on Overview of modern Materials Testing Systems was published (7) in Issue 153 of Practical Welding Letter for May 2016. An Article on Modern High Temperature Testing was published (11) in Issue 155 of Practical Welding Letter for July 2016. An Article on Cold Spray Characterization was published (7) in Issue 156 of Practical Welding Letter for August 2016. An Article on Avoiding Overwelding was published (3) in Issue 159 of Practical Welding Letter for November 2016. An Article on Putting Welds to the Test was published (11) in Issue 166 of Practical Welding Letter for June 2017.
To receive the newsletter as it is released, please subscribe at no cost.
WW1 Spad XIII Fighter
Any questions or comments or feedback? Write them down and send them to us by e-mail. Click on the Contact Us button in the NavBar at top left of every page.
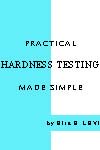
We believe that you can find in the book some useful insights on the meaning of hardness testing results, readily applicable to your welding jobs. To reach a Guide to the collection of the most important Articles from Past Issues of Practical Welding Letter,
Welding Design
POWERED BY: Click on this Logo NOW! Watch - The Video: and also
Copyright (c) 2003-2008, 2009, 2010, 2011, 2012, 2013, 2014, 2015, 2016, 2017  Welding-testing is the best and inexpensive proof of the adequacy of performance. Be the first to know. Read here how...
|


